When you click on links to various merchants on this site and make a purchase, this can result in this site earning a commission. Affiliate programs and affiliations include, but are not limited to, the eBay Partner Network.
Price: $450.00

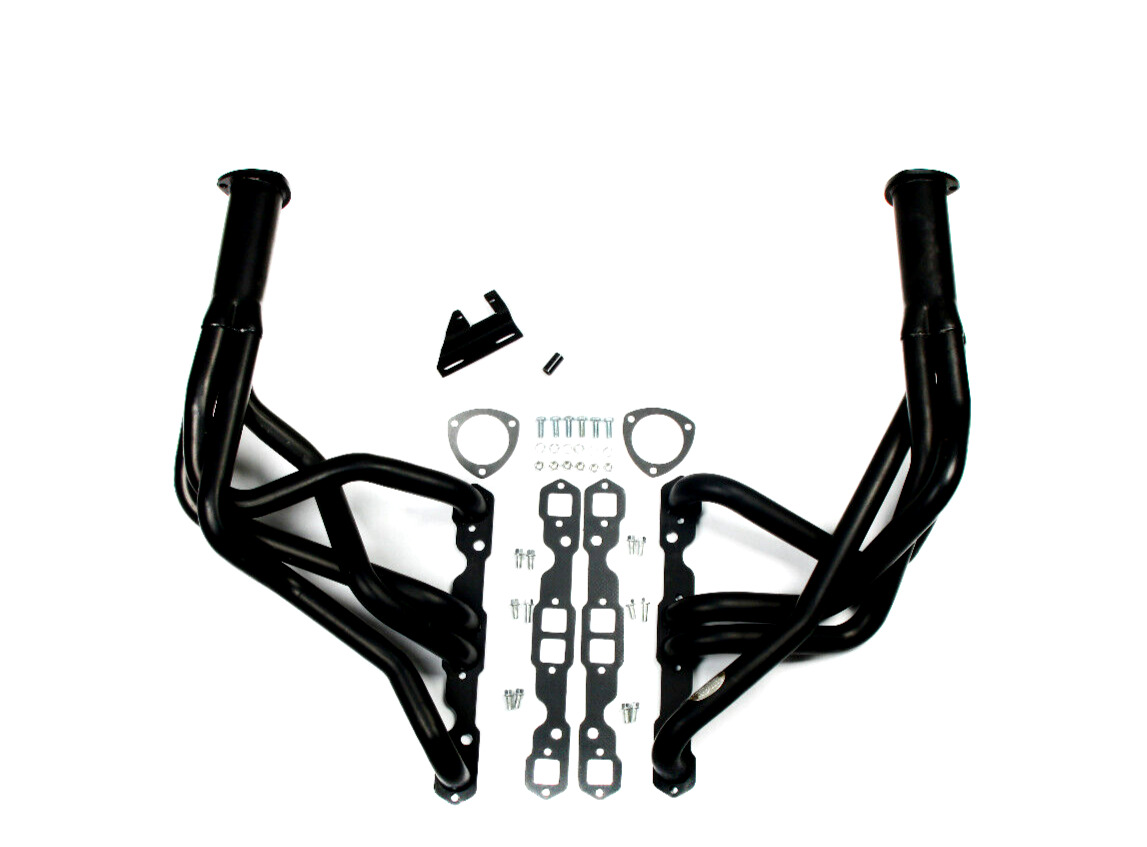
APPLICATION:
- For1967-69 Camaro, 1968-74 Chevy II / Nova, & 1965-70 Passenger / Wagons (265-400)
TECH SPECS:
- Header Type:Shorty / Short Tube
- Material:Mild Steel
- Finish:High Temperature Black Coating
INSTALLATION PROCEDUREBEFORE STARTINGYour vehicle must be raised a minimum of 36 inches. A floor hoist is ideal. If no hoist is available, we strongly urge the use of axlestands as a safety measure. CAUTION! YOUR CAR SHOULD NOT BE SUPPORTED ON A BUMPER JACK.INSTALLATION PROCEDURE – PLEASE READ CAREFULLYLEFT SIDE:1. Disconnect the battery cable to prevent damage to the electrical system.2. Remove the stock exhaust manifold and alternator or generator.3. Remove the clutch linkage and clutch cross shaft.4. Remove the oil filter, spark plugs, and dipstick tube.NOTE: The heat indicator will not have to be removed. However, care should be taken not to damage it when installing your newheader.5. Some models may require that the engine be jacked up slightly. Be sure to use a flat board between the oil pan and jack. It willnot be necessary for all models.6. Work the header into the proper position (from under chassis).7. Position the header and install the gasket. (It may be necessary to trim the bolts in the “A” frame to allow adequate clearance.This is not required for all models.)8. Start all bolts (most restricted first).NOTE: Replace the alternator. Some models will require the furnished rear bracket (Figure A2). If header is equipped with smogbushings, the rear bracket must be notched to clear the bushing (Figure E).NOTE: All models will require the screw-on type oil filter (if not already equipped).NOTE; Cars equipped with power steering require the power steering spacer from the accessory pack (Figure B).NOTE: Cars using a column shift linkage, refer to Figure C for required modifications.NOTE: Cars equipped with A/C will require either bracket (left side) or (right side). See Figure D.RIGHT SIDE:1. Remove the stock exhaust manifold and spark plugs.2. Work header up through the chassis into position.3. Position the gasket between the flange and header. Some models will require trimming the “A” fame bolts.4. Start all bolts (most restricted first).5. Tighten all bolts (most restricted first). NOTE: Cars equipped with A/C will require either bracket (left side) or (right side). See Figure D.6. Connect the battery.7. To connect the headers to the stock exhaust system, purchase Reducer kit.8. Connect the battery, start the engine, and check for leaks. 9. Be sure all brake lines, fuel lines, transmission cooler lines, and electrical wires have sufficient clearance. Reroute, as necessary.10. When finished, give your vehicle a test drive, checking carefully for any new noises. After several days of driving, retighten allbolts.
Note: The items you received are shown in the figure. If you have any questions later, please contact the after-sales staff in time.
NOTICE:
All international buyers are subject to pay import TAX and VAT CHARGES in addtion to ship and hand. when ordering from the US,parcels may be subject to import TAX and DUTY CHARGES,which the buyer is responsible to pay.
Additional 25% Shipping fee for ALASKA and HAWAII... Please contact sellers for details.